In this tutorial, we will explain how to prepare a print-ready PDF file using Adobe InDesign CC, Adobe Illustrator CC and Adobe Photoshop CC. Different printing materials have different guides. You may find and download the guides under description of each product page. Most of our guides require 0.0625″ bleed on each side (Left, right, top and bottom), which is 0.125″ in total vertically and horizontally.
Adobe InDesign CC
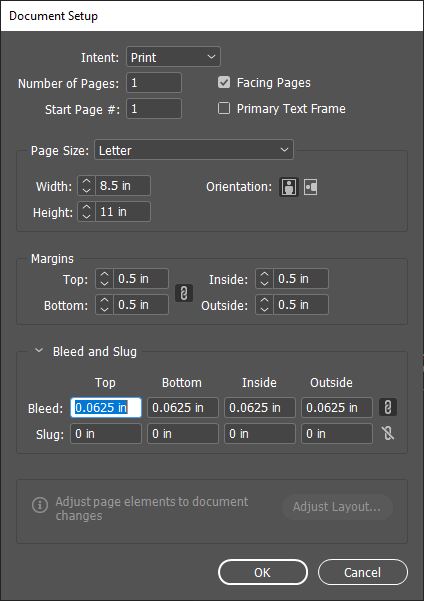
- Go to File > Document Setup
- Click to expand the Bleed and Slug section
- Enable Mark All Settings the Same by clicking
- Enter the desired bleed, which should be 0.0625″. If the Units are not set to inches, you may change it to inches by going to Edit > Preferences > Units & Increment.
- Next, make sure all blacks are set to C: 0 M: 0 Y: 0 K: 100.
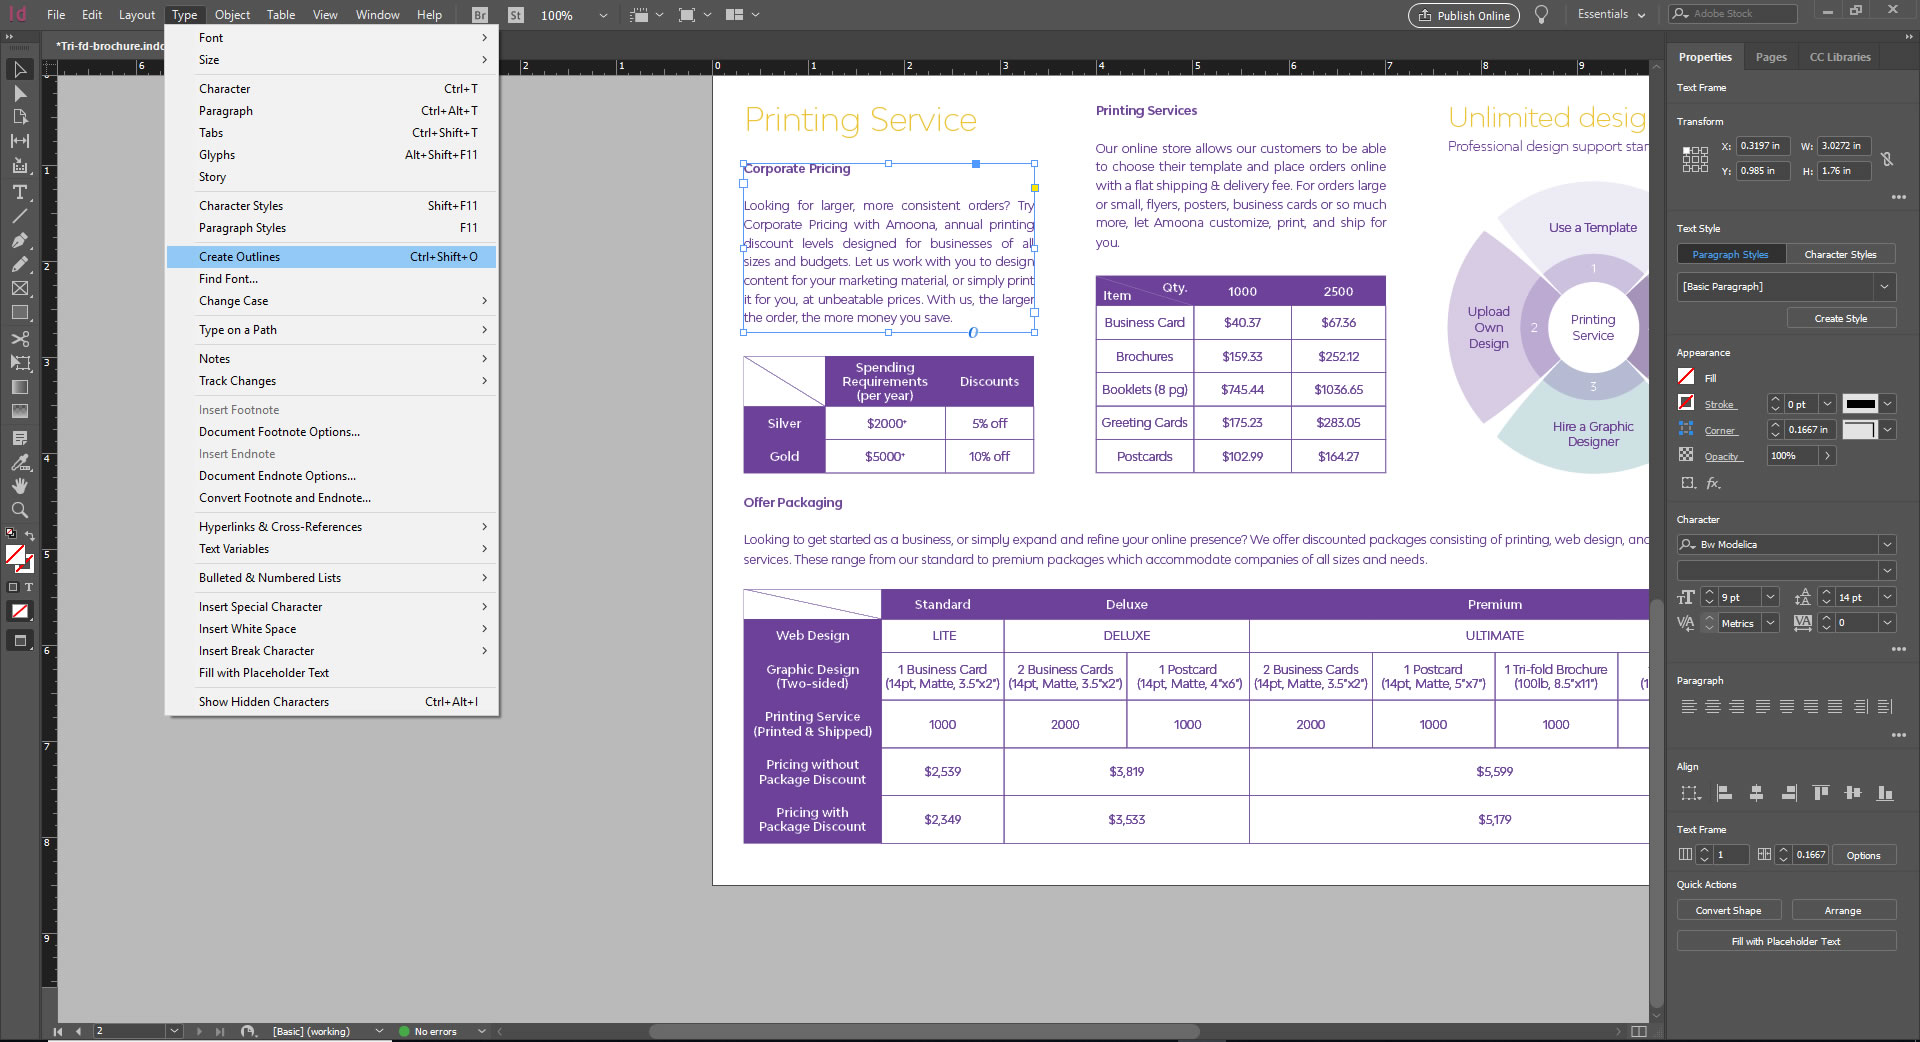
- After you are happy with your design, select all text boxes, and go to Type > Create Outlines or use the shortcut key Ctrl + Shift + O.
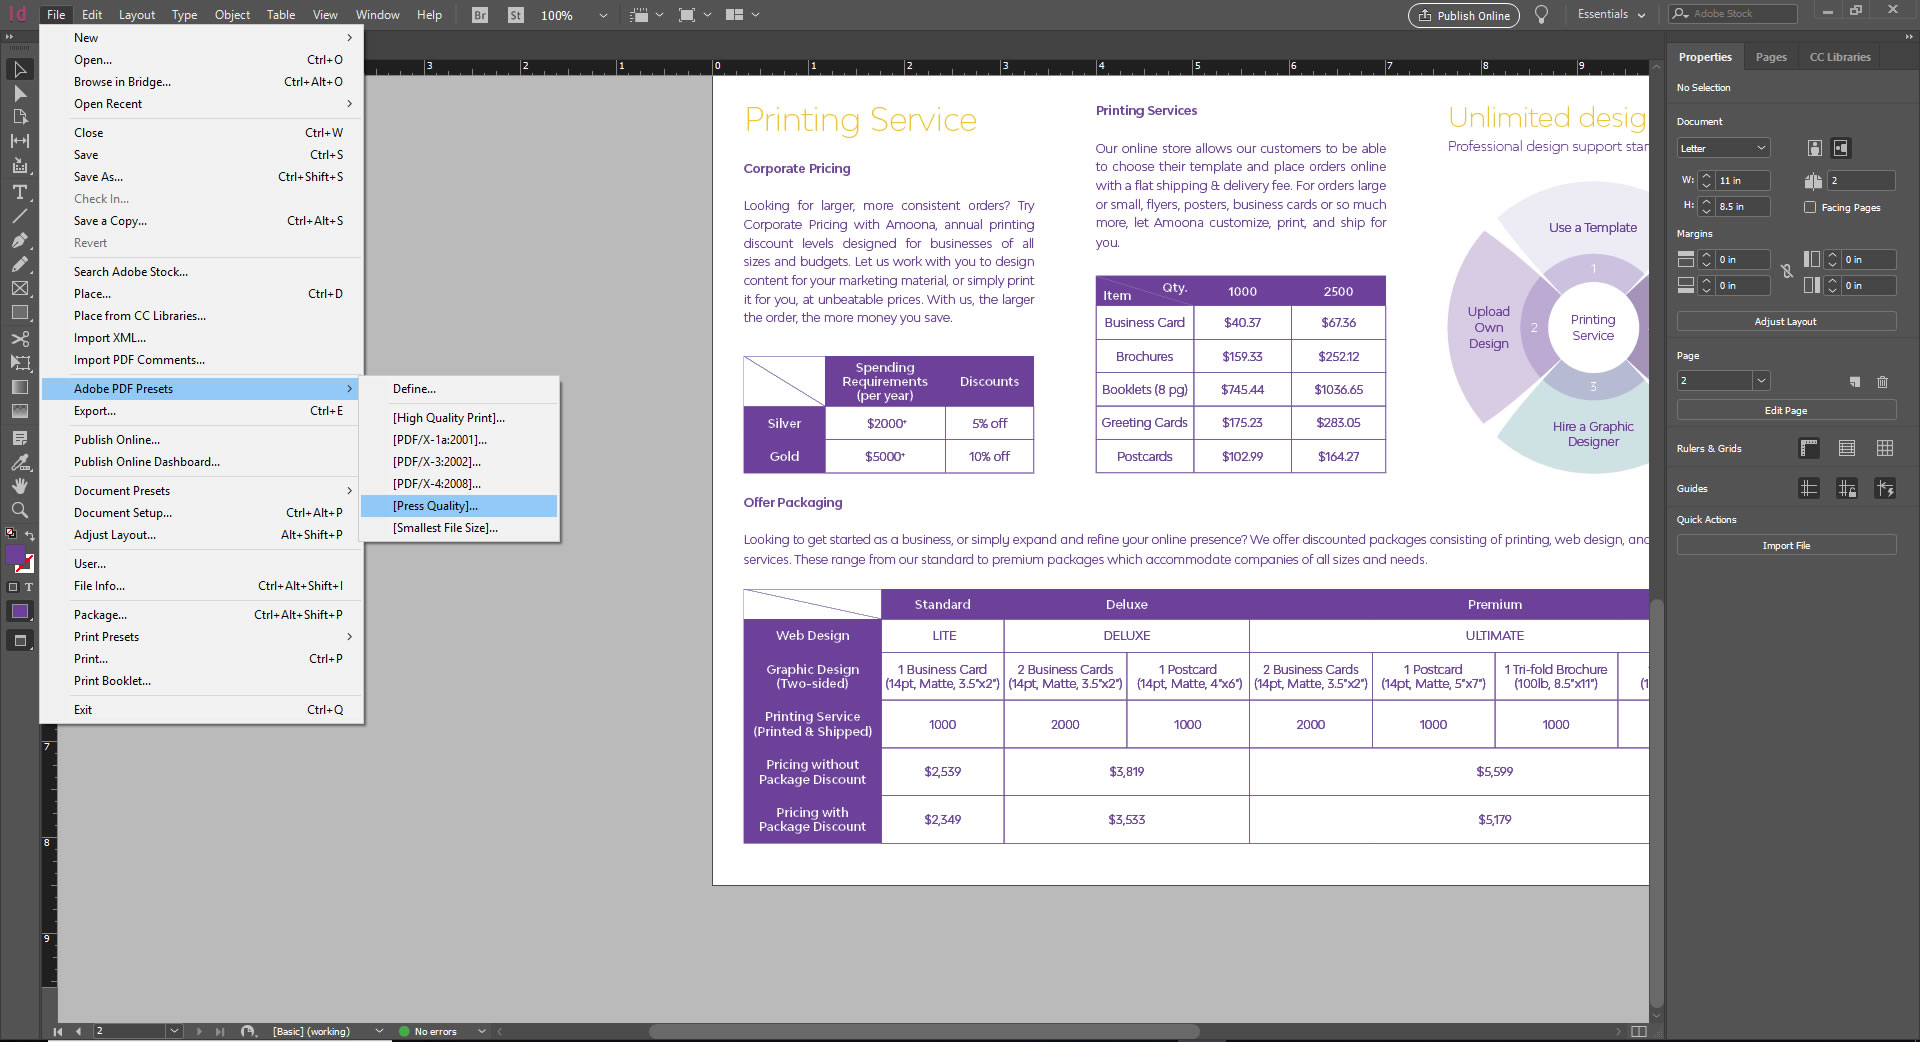
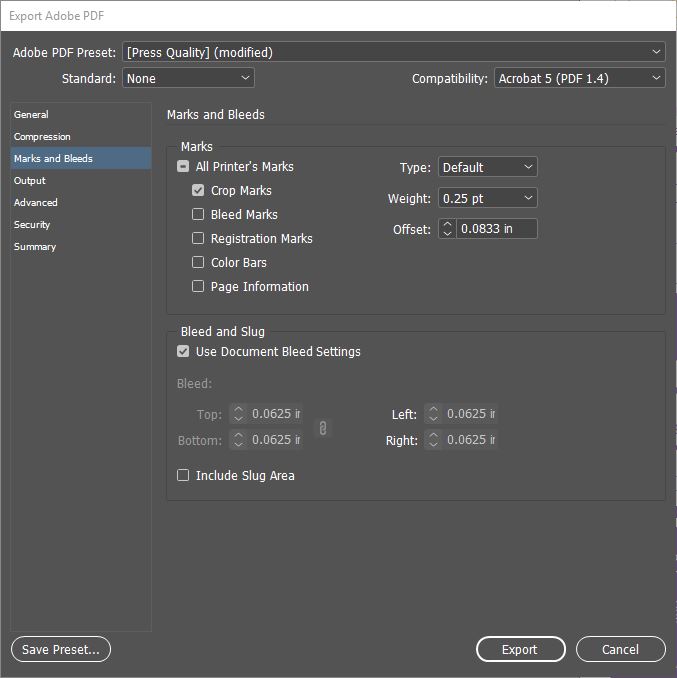
7. Now we are ready to export the PDF file. Go to File > Adobe PDF Presets > [Press Quality].
8. After select a place and name to save your file, the Export Adobe PDF window will pop up. Select Marks and Bleeds from the left column and select Crop Marks and Use Document Bleed Settings. If you have setup the bleed at step 4, you should see the bleed is 0.0625 in. Click Export and the print-ready PDF will be saved and ready to upload.
Adobe Illustrator CC
- To setup the bleed in Adobe Illustrator CC is pretty much the same as Adobe InDesign CC.
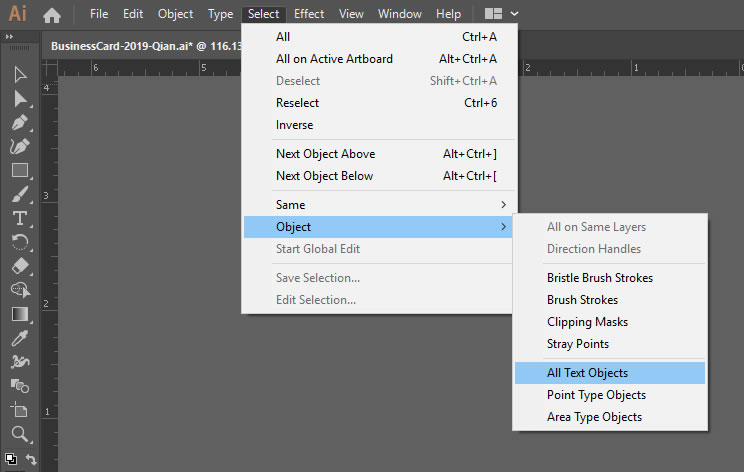
- Adobe InDesign CC doesn’t have the option to let you easily select all text objects. While in Adobe Illustrator CC, you can do that by going to Select > Object > All Text Objects.
- With all text objects selected, go to Type > Create Outlines.
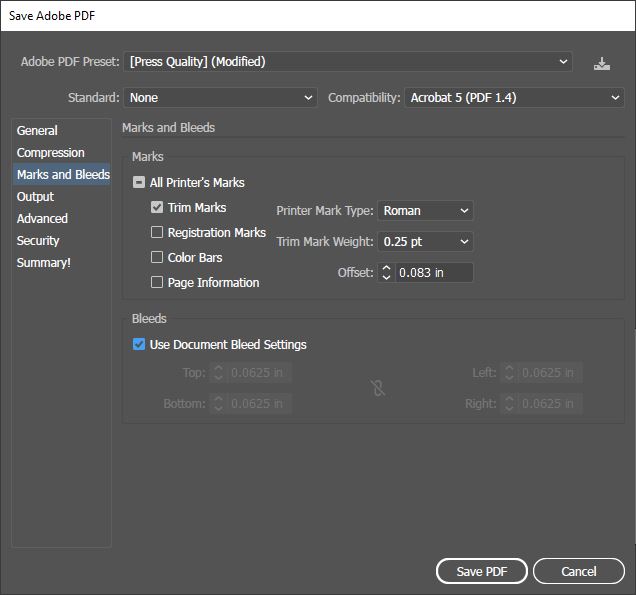
- To export the print-ready PDF file, go to File > Save As, and select Adobe PDF as the file type.
- After clicking save, the Save Adobe PDF window will pop up. Choose [Press Quality] at the top beside Adobe PDF Preset. And click Mark and Bleeds from the left column. Click on Trim Marks and Use Document Bleed Settings. The bleed should be 0.0625 in on each side (Top, Bottom, Left and Right).
- Click Save PDF, and the file is ready to be uploaded and sent to print.
Adobe Photoshop CC
It is not recommended to export press quality PDF file directly from Adobe Photoshop CC. If you have a Photoshop design file, you can import it into InDesign using place tool and follow the step and export the press quality file from InDesign.
You can contact us by filling out the contact form on our home page, emailing us at [email protected], finding us on social media (@amoonastudio on Instagram, Facebook, Twitter, or @amoonastudioinc LinkedIn), or by giving us a call at our primary number (226) 336-9933. Check out our blog here.
I hope this tutorial is helpful. If you have any questions, please feel free to leave a comment, I will be more than happy to add more tips.


